Learn how to record a kick drum from the production team at Silicon Beats with this detailed turorial with audio examples, images and videos.
Step 1 – Decide what type of kick drum sound you want to create
This might sound obvious, but if you’re dealing with a young rock band, the chances are they probably haven’t given much thought on how to record a kick drum. This is arguably one of the most important elements of any mix. If the kick drum is weak and muddy in the mix, it doesn’t matter how massive your guitars sound. Your band is going to sound feeble.
How to Record a Kick Drum – Example Recordings
Here are three examples of different tones created by different kick drums based on genre. Each kick is tuned to suite the musical genre. You can download these kick drum samples for free.
The first step in learning how to record a kick drum is to educate your ears by listening to other bands in your genre that have high quality recordings. Try to pinpoint the reasons why you feel their drum sound is good, what is it that you like about that drum sound?
 How Should a Kick Drum Sound?
If you’re recording a jazz drummer, you’ll be aiming for a totally different kick drum sound to a death metal drummer. The drummers would use different sizes of drums, different tone woods, different heads and different beaters on the kick drum pedal. Know the sound you’re aiming for before even walking into the studio. Put some time into creating that kick drum sound before you even think about getting the mics out.
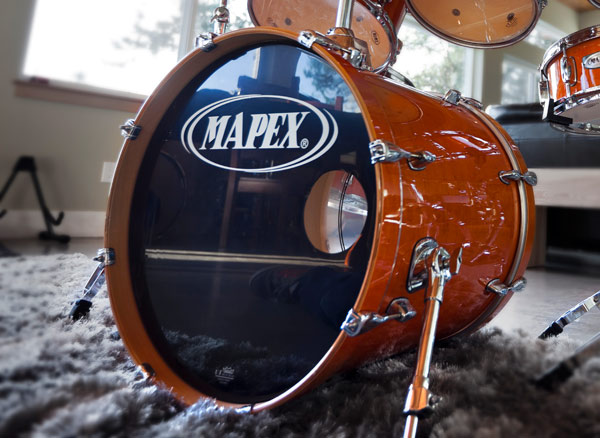
Another important factor is the tonal characteristics of the wood used for the construction of the drum shells. Maple, Oak, Birch and Mahogany all have very different sounds, with Maple being the loudest and Mahogany being the brightest.
I prefer to record with Maple shells because their loudness virtually eliminates any imbalance with hi-hats and cymbals overpowering the loudness of your drums.
Funk and jazz drummers might prefer a felt beater on their kick drum pedal, as it creates a softer tone with less click. Typically they’ll want a more resonating kick drum sound that has little to no dampening.
Rock and Metal drummers usually need a brighter kick drum sound with lots of click so it cuts through the wall of guitars in the mix.
You can use the plastic beater on the kick drum pedal and if you want a really ‘clicky’ sound, try sticking a metal click pad on the beater head of the kick drum. Drummers won’t like how that feels and may need some time to get used to it.
Step 2 – Choose the right kick drum
When learning how to record a kick drum, realize there are no rules. It’s fair to say that you’ll have more chance of getting the right sound if you choose the right instrument for the job. Choosing the right kick drum can be as simple as consulting a drum manufacturers product catalogue and just going with what they suggest is the right drum for your genre. That will probably work as they should know what they are talking about, however it pays to experiment.
 A good quality kick drum should be able to produce a variety of tones depending on how you tune the heads and what type of heads you use.
It’s worth noting that you can actually achieve an awesome rock kick drum sound even from a small jazz style kick drum if you know how to tune it, however it’s doubtful that you’ll achieve the reverse if you start out with massive kick drum for metal.
Either way, take some time out to experiment with the drums you have and if you can’t get the sound you need, consider renting something ideal for the job. There’s no point spending lots of money recording a crappy drum set and renting is usually very affordable.
Step 3 – Choosing the right drum heads
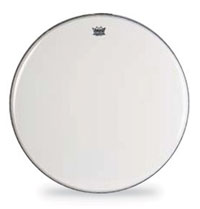 First off, use the right type of drum heads (skins) for the type of sound you want. You might even want to use a selection of drum heads for different songs or even just different parts of songs.
Using a 2 ply drum head will deliver more attack and often shorter sustain while a single ply drum head will deliver increased resonance with more sustain.
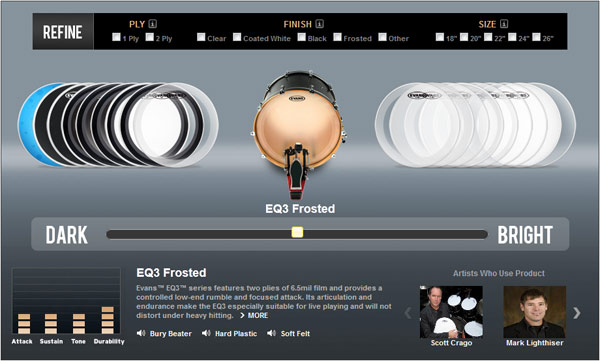
The Evans web site offers a superb tool for choosing the right type of kick drum heads with audio examples and some basic stats on things like attack, sustain, tone and durability. I strongly recommend you check out this really useful tool before deciding which drum heads to buy.
http://www.evansdrumheads.com/EvDrumsetBassBatter.Page?ActiveID=3587
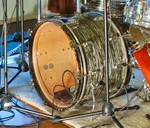
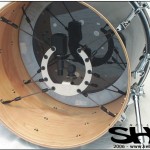
Do I need to cut a hole in the resonant head?
In most cases you’ll be recording your kick drum along with the rest of the drum set, so you’ll need to make a decision about whether or not to cut a hole in the resonant head of your kick drum. Why do we do this? We do this in an attempt to create some isolation between the different drum mics and prevent mic bleed. The hole allows us to place a microphone right inside the drum shell.
 I can guarantee that even with your kick drum mic placed right inside your kick drum, you’ll still pick up some of the snare drum and other parts of the drum set. Placing the kick drum mic outside of the kick drum makes this problem even worse so you can see why many engineers opt for the hole in the resonant head.
It’s a compromise, but one that’s usually worth it. You should still be able to achieve an excellent kick drum sound even after cutting the hole and now you’ve got the added luxury of less mic bleed.
If, however you are lucky enough to have a superb drummer with a superbly tuned drum set, try micing the entire kit first without cutting the hole in the kick drums resonant head. Depending on the type of sound you’re going for you might actually want a touch of mic bleed for a live sound.
How do I cut the hole?
One of the easiest methods I’ve seen for cutting the hole in the reso head involves a heated can placed on the drum head which simply melts through the plastic. I’m not sure if the head is any more or less structurally sound with a melted hole as opposed to a cut hole, but it’s a heck of a lot easier. Check out this cool vid.
Step 4 – Tuning the Kick Drum
This is the MOST important part of the recording process. Get this right and you’ll get an awesome drum sound in your production. Get it wrong, and no amount of EQ or compression is going to get you the results you’d hoped for.
You cannot polish a turd.
YouTube is overflowing with tutorial videos on how to tune drums so rather than reinvent the wheel I’ll point out some related tuning tips that experience has taught me to watch out for. We sourced this cool video from ‘freedrumlessons’ but there are many others.
Tuning Pitfalls – What to watch out for
Listen for the dreaded basketball ringing. Not all kick drums do this but occasionally I’ll encounter a kick drum that has been tuned in such a way that after the initial attack dies off, there is a high pitched ‘ringing’ note that sustains for quite a long time and sounds a like a basketball after it just hit the floor.
Be sure to avoid this by re-tuning or experimenting with different heads. I once had a beautiful new Premiere drum set that had one of the fattest kick drums I’ve ever heard, but the dreaded basketball ring took hours to eliminate and would have ruined the entire drum mix if left unfixed.
Listen for any rattling hardware and either tighten up the loose parts or dampen them into silence with tape or blu-tack.
Regularly reference the sound of your newly tuned kick drum against your favourite recordings to make sure you’re on the right track. Just like any mixing/mastering engineer, you need to constantly be tuning your ears as to what a good kick drum sounds like. Get it right at the source and you’ll be thankful later.
Step 5 – Room Placement
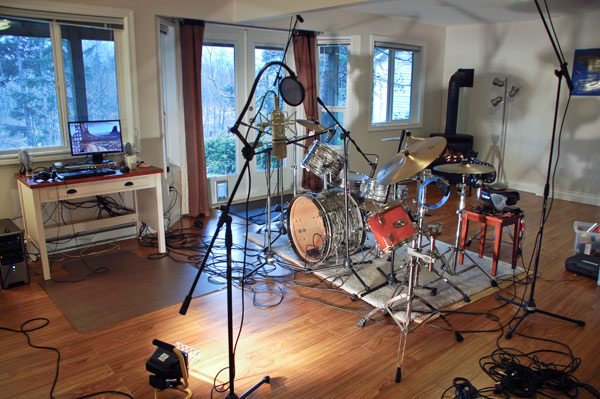
If you’re planning on including some room ambience in your drum mix (and I hope you are), it’s very important to position your drum set in your live room so as to create pleasant sounding room reflections.
What do I mean by room reflections? Well, drums produce a lot of loud sound waves and sound waves bounce around and reflect off surfaces like floors, walls, ceilings and windows. If you position your drum set so that it’s facing a metal garage door, don’t be surprised if it sounds like a bag of smashed crabs.
Give the high energy sound waves some breathing space so that they get the chance to be diffused by objects within the room. If you are planning on recording in a garage, do NOT empty the garage of all those ancient board games and hockey sticks. Leave it all where it is and see how it sounds. Four bare walls will not make for a good drum sound.
Move The Drum Set And Listen to the Room
I use a very unscientific approach for this. Simply move the drum set around the room and have your drummer play while you listen to how the room responds. Try all the corners of the room making sure you face the drum set towards the room away from the nearest walls.
The easiest way to do this is to just setup the kick drum, hi-hat and snare drum and place them on a piece of carpet so you can effectively drag the carpet with the drum set to different places within the room.
Try the centre, corners, third in, quarter in, whatever you like. The shape of the room and the height of the ceiling will dictate how far you can experiment and you’ll know when you hear the sweet spot.
Take things a step further and place a stereo pair of microphones within the room while you’re moving the drum set around. Listen to the recording and decide which position sounds best on playback.
At this point you’ll start to get a feel for the type of drum sound you’ll be able to create. If your room ambience is sounding awesome you are well on your way to capturing a stunning live drum recording.
I’ll discuss room ambience further in another article, for now let’s nail this kick drum sound.
Step 6 – Mic placement
To effectively mic up a kick drum I like to use two mics. One inside the kick drum for that dry, tight and focused kick sound with a minimum of mic bleed and another mic placed just outside the kick drum about 4ft away from the resonant head. Take a listen to the examples below to hear how these two different mic placements sound in comparison.
 Best Microphone for the Money
I like to use the AKG D112, which is a dynamic microphone that’s particularly good at picking up low bass frequencies. It’s also extremely affordable and holds its own against much more expensive mics.
For recording the inside of the kick drum, insert the mic inside the hole we made in the resonant head and point it towards the beater head to get plenty of attack and click. If you want a softer tone angle the mic away from the beater head and towards the inner drum shell.
 My most recent toy is the ‘Kelly Shu shock mount system’ which enables me to place my kick drum mic right inside the kick drum without cutting a great big hole in the resonant head. You only need a hole big enough to get your mic cable through because there is no need for a mic stand. It works really well.
Next I like to place another kick drum mic (you can use another AKG D112) about 4ft away from the resonant head, fairly close to the floor and pointing directly at the resonant head.
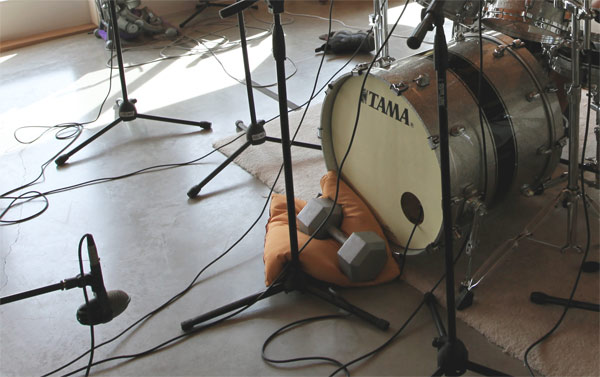
The sound from this mic picks up a lot of energy exiting the resonant head of the kick drum and offers a nice balance to the less natural sound that you get from inside the kick drum.
It’s also close enough to the reso head that it’s still a fairly tight and focused sound as opposed to becoming just another room mic. If your multi-track system allows for this extra mic you’ll be very glad you added it.
Step 7 – Final Tweaks
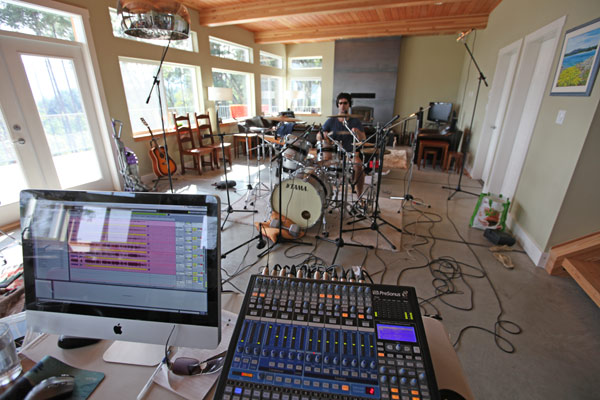 Now that you’re all setup it’s time to record some audio and see how it sounds on playback.
Check the playback through headphones and speakers. The headphones will reveal any problem areas such as rattling hardware and unpleasant overtones. Listening via speakers will reveal the tonal characteristics, is it too dull or too bright, does it require more or less dampening?
If your kick drum is just too resonant, stuff a couple of small cushions and maybe some acoustic foam inside the drum shell. Don’t overdo it though. Just get it sounding tighter but not dull. I like to carefully place a small sheet inside the drum shell that makes light contact with both heads.
Ideally you won’t need to dampen the kick drum at all. If it’s a high quality construction and tuned well, you should be able to achieve an excellent sound without any dampening. If not, don’t worry, remember there are no rules.
We hope you enjoyed our ‘How to Record a Kick Drum’ tutorial. Coming Soon! How to record a snare drum.
Please share your suggestions and experiences by leaving a comment.